SKU: OT760-D37 Numero articolo: AA115 EAN: 8720589817258

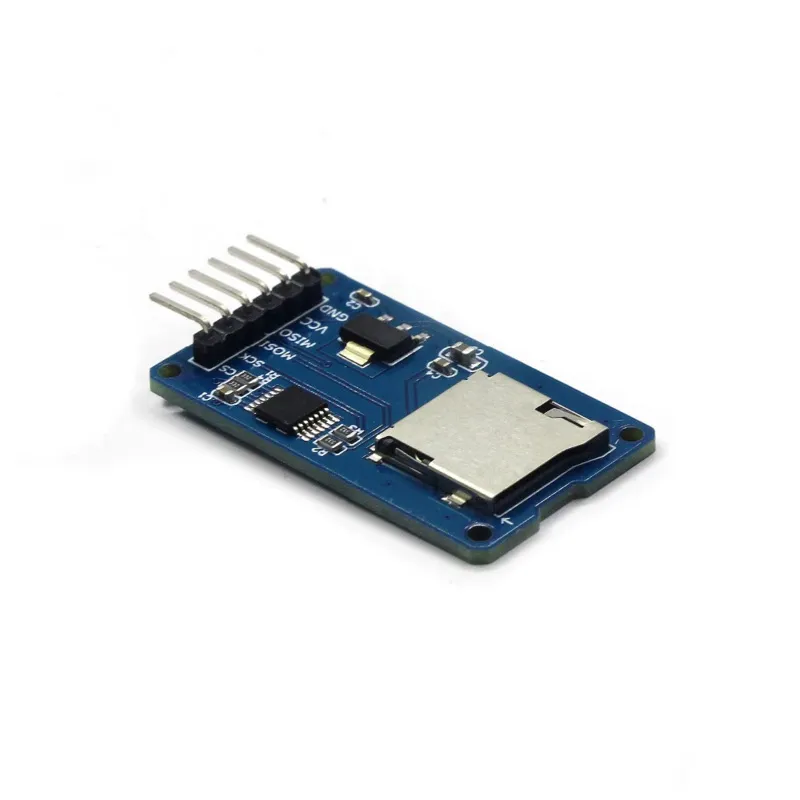
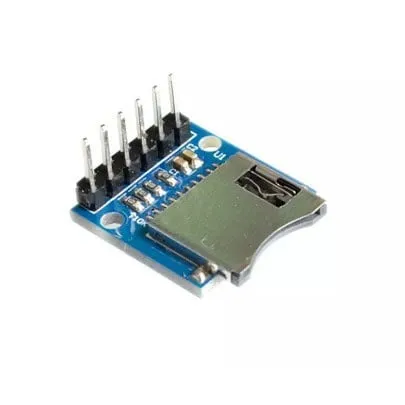
Questo lettore di schede micro SD è adatto per Arudino, ESP8266, ESP32, Wemos ecc. È già parte della libreria standard Arduino.
Ideale per leggere e scrivere file. La capacità di archiviazione è determinata dalla scheda micro SD inserita.
Tipo di scheda: Micro SD fino a max. 2GB e Micro SDHC fino a max 32GB
Corrente del circuito: 3.3V e 5V
Connessioni: VCC, GND, MISO, MOSI, SCK/SPI e CS
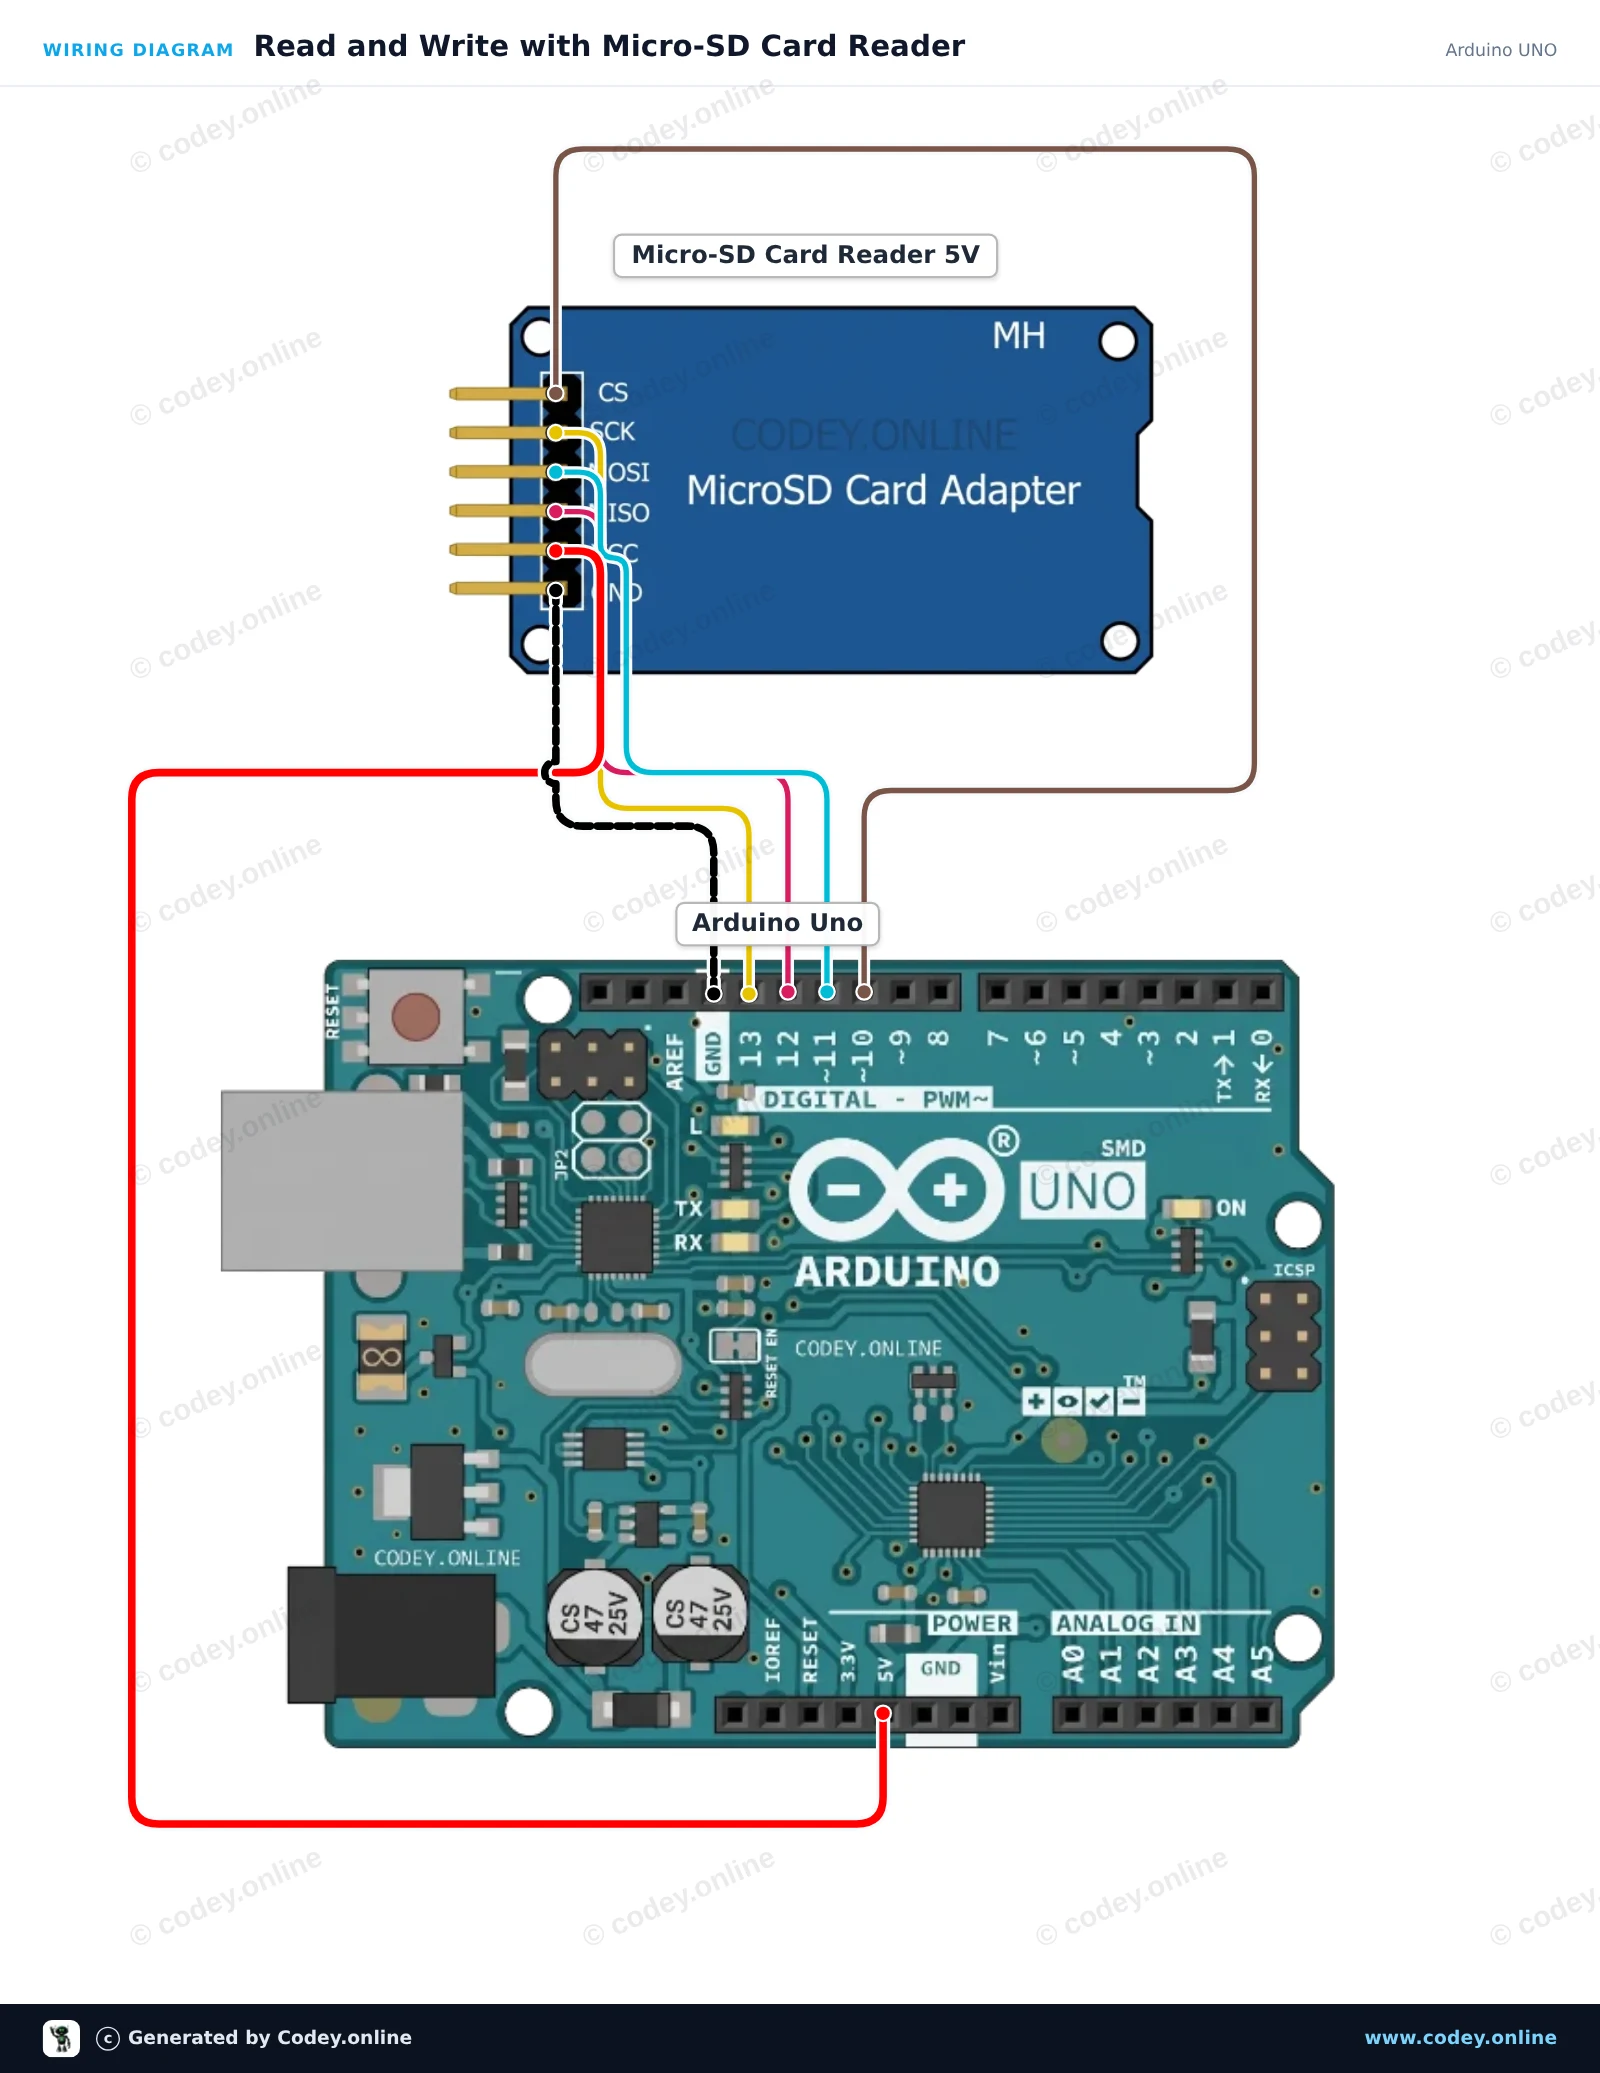
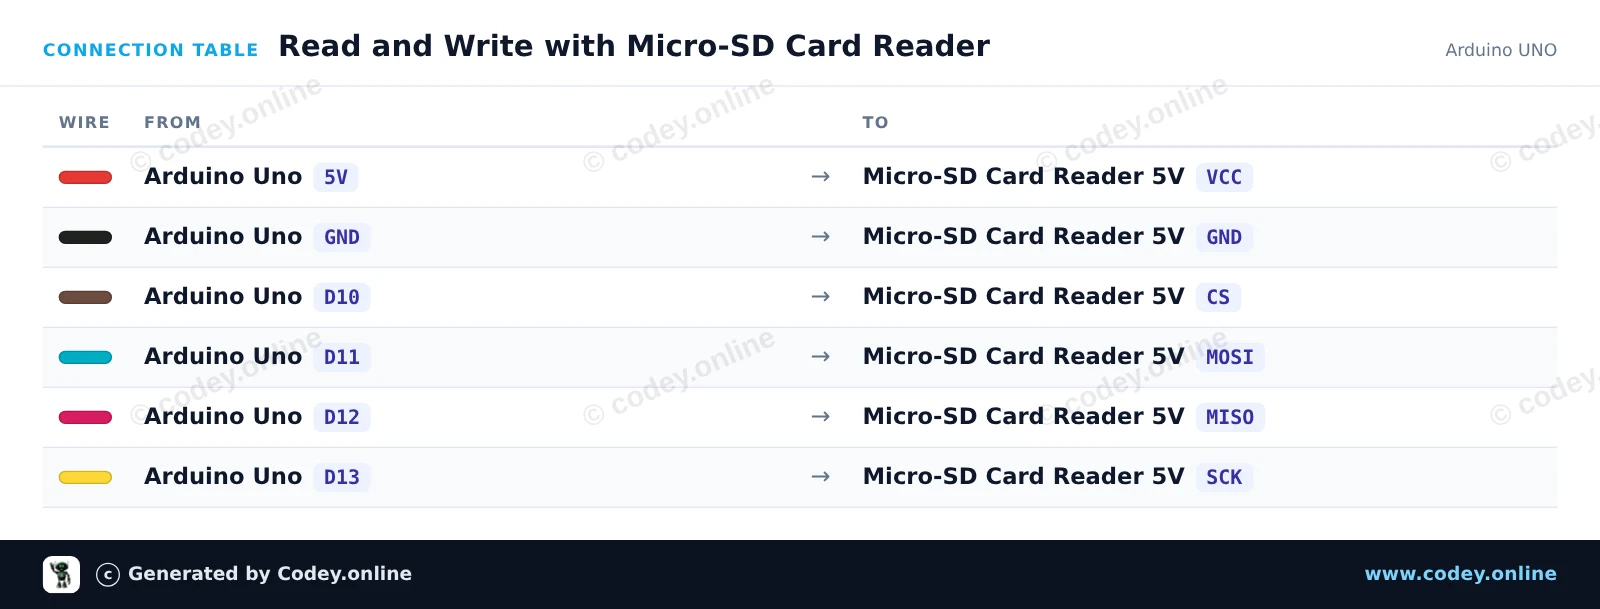
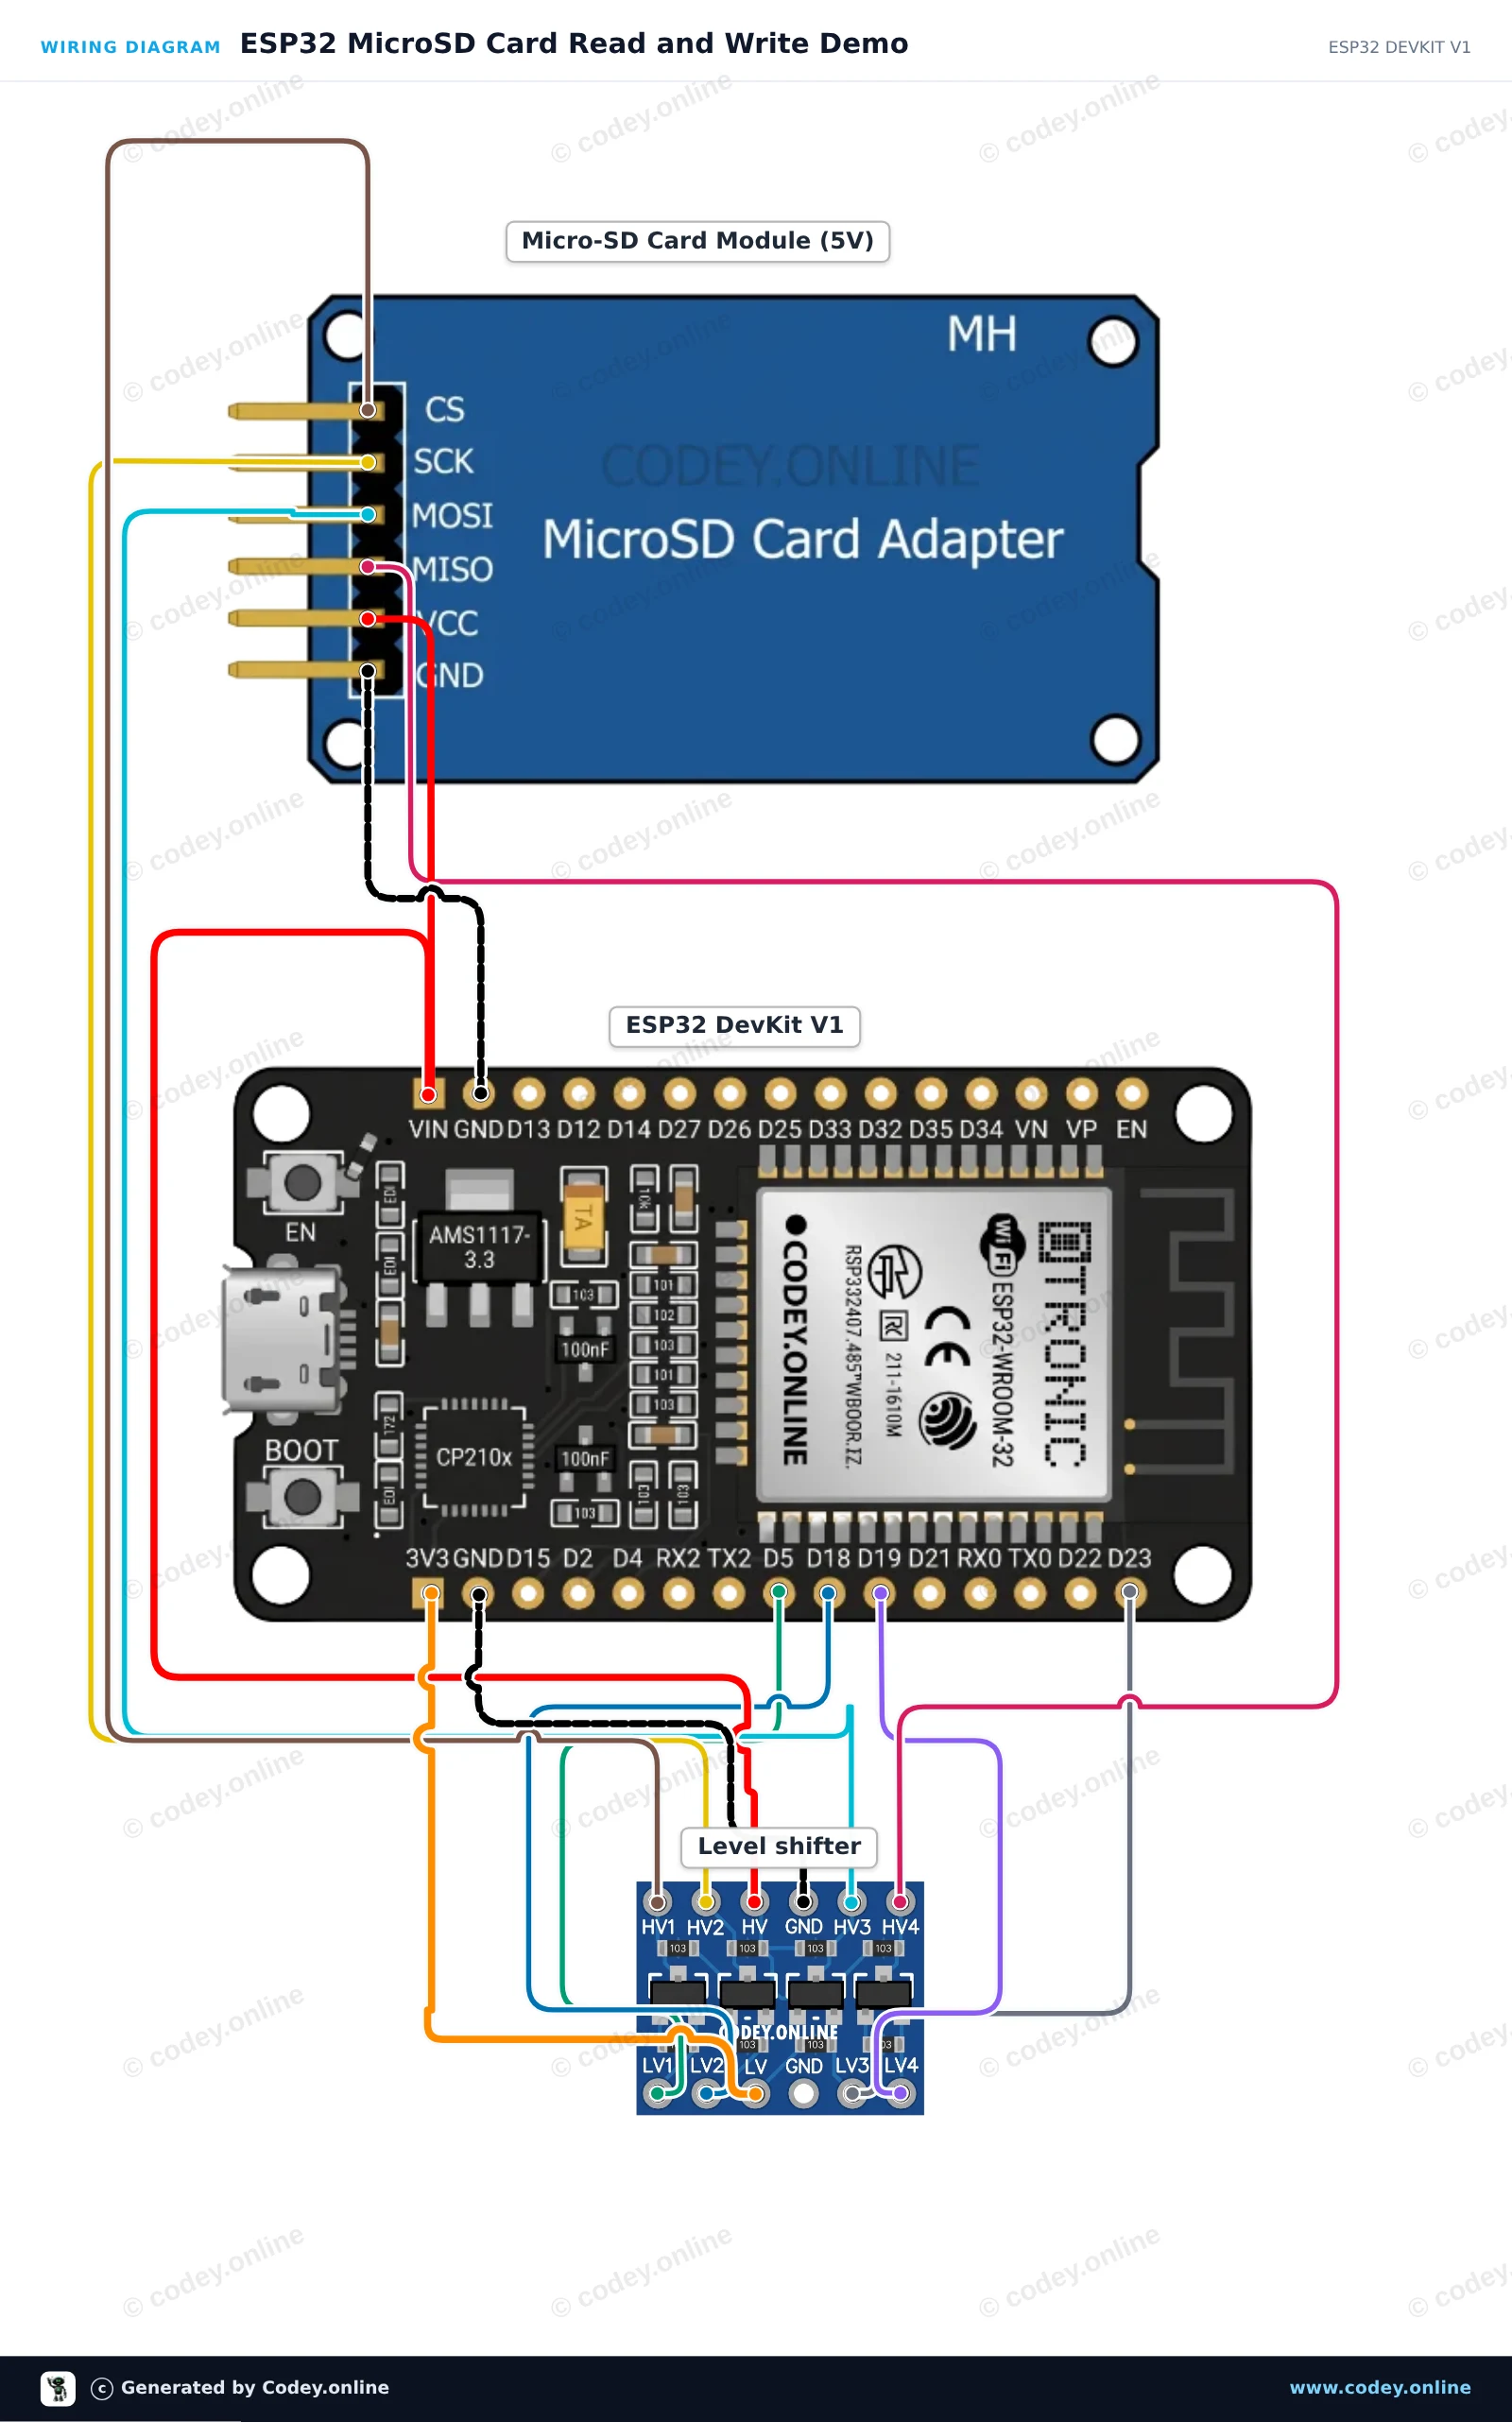
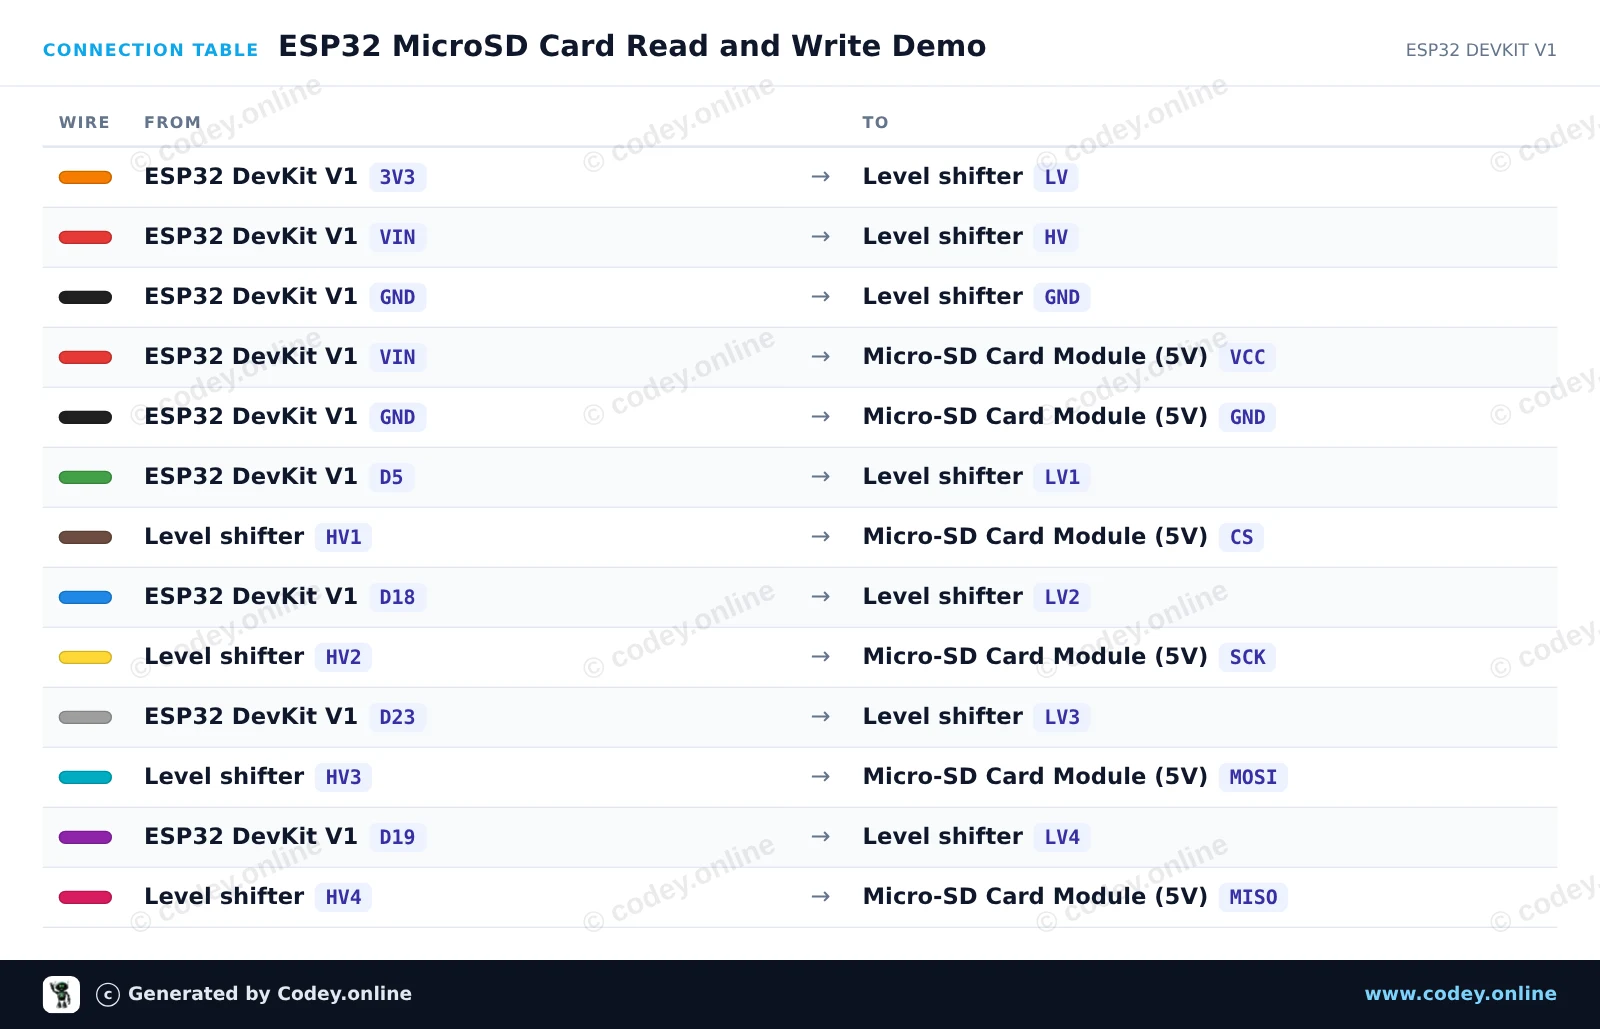
Ecco come collegare il Lettore di schede Micro SD per Arduino a un Arduino UNO o ESP32, con uno sketch di esempio che puoi caricare subito.
Questo progetto mostra come collegare un lettore di schede Micro-SD 5V a un Arduino Uno utilizzando la comunicazione SPI. Lo sketch inizializza la scheda SD, scrive una riga di testo in un file chiamato test.txt e legge il file nel Monitor Seriale. Apri il Monitor Seriale a 115200 baud per visualizzare l'output.
/*
 * ==================================================================
 *  Generated by Codey.online  —  https://www.codey.online
 * ==================================================================
 *  Project   : Read and Write with Micro-SD Card Reader
 *  Board     : Arduino UNO (arduino:avr:uno)
 *  Parts     : Micro-SD Card Reader 5V
 *  Libraries : none (built-in)
 *
 *  Codey Online is an AI-powered browser IDE for Arduino and ESP32.
 *  Describe your project and Codey writes the code, draws the wiring
 *  diagram and uploads it to your board, straight from the browser.
 *  This code is free to use, modify and share, without warranty.
 * ==================================================================
 */

#include <SPI.h>
#include <SD.h>

const int chipSelect = 10;

void setup() {
  Serial.begin(115200);
  while (!Serial) {
    ; // Wait for serial port to connect
  }

  Serial.println(F("Initializing SD card..."));

  if (!SD.begin(chipSelect)) {
    Serial.println(F("Initialization failed! Check wiring and FAT16/FAT32 format."));
    return;
  }
  Serial.println(F("Initialization done."));

  // Write data to the card
  File myFile = SD.open("test.txt", FILE_WRITE);
  if (myFile) {
    Serial.print(F("Writing to test.txt..."));
    myFile.println(F("Hello from Arduino UNO!"));
    myFile.close();
    Serial.println(F(" done."));
  } else {
    Serial.println(F("Error opening test.txt for writing."));
  }

  // Read data back from the card
  myFile = SD.open("test.txt");
  if (myFile) {
    Serial.println(F("--- Content of test.txt ---"));
    while (myFile.available()) {
      Serial.write(myFile.read());
    }
    myFile.close();
    Serial.println(F("--- End of file ---"));
  } else {
    Serial.println(F("Error opening test.txt for reading."));
  }
}

void loop() {
  // Demo runs once in setup
}Wiring diagram and example code generated by Codey.online — https://www.codey.online
Collega il modulo scheda MicroSD 5V all'ESP32 usando un convertitore di livello logico a 4 canali per garantire una comunicazione SPI sicura a 3.3V. Lo sketch inizializza la scheda SD sul bus VSPI, crea e scrive un file di test e ne legge il contenuto tramite il Serial Monitor a 115200 baud.
/*
 * ==================================================================
 *  Generated by Codey.online  —  https://www.codey.online
 * ==================================================================
 *  Project   : ESP32 MicroSD Card Read and Write Demo
 *  Board     : ESP32 DEVKIT V1 (esp32:esp32:esp32doit-devkit-v1)
 *  Parts     : Micro-SD Card Reader 5V
 *  Libraries : none (built-in)
 *
 *  Codey Online is an AI-powered browser IDE for Arduino and ESP32.
 *  Describe your project and Codey writes the code, draws the wiring
 *  diagram and uploads it to your board, straight from the browser.
 *  This code is free to use, modify and share, without warranty.
 * ==================================================================
 */

#include "FS.h"
#include "SD.h"
#include "SPI.h"

const int chipSelect = 5;

void setup() {
  Serial.begin(115200);
  while (!Serial) { delay(10); }

  Serial.println("Initializing SD card...");

  if (!SD.begin(chipSelect)) {
    Serial.println("Card Mount Failed! Check wiring and ensure a FAT32 card is inserted.");
    return;
  }

  uint8_t cardType = SD.cardType();
  if (cardType == CARD_NONE) {
    Serial.println("No SD card attached.");
    return;
  }

  Serial.print("SD Card Type: ");
  if (cardType == CARD_MMC) Serial.println("MMC");
  else if (cardType == CARD_SD) Serial.println("SDSC");
  else if (cardType == CARD_SDHC) Serial.println("SDHC");
  else Serial.println("UNKNOWN");

  uint64_t cardSize = SD.cardSize() / (1024 * 1024);
  Serial.printf("SD Card Size: %lluMB\n", cardSize);

  // Write to a test file
  Serial.println("Writing to test.txt...");
  File file = SD.open("/test.txt", FILE_WRITE);
  if (file) {
    file.println("Hello from ESP32 and MicroSD Card!");
    file.close();
    Serial.println("Write complete.");
  } else {
    Serial.println("Error opening file for writing.");
  }

  // Read the test file back
  Serial.println("Reading test.txt:");
  file = SD.open("/test.txt");
  if (file) {
    while (file.available()) {
      Serial.write(file.read());
    }
    file.close();
  } else {
    Serial.println("Error opening file for reading.");
  }
}

void loop() {
  // Idle
}Wiring diagram and example code generated by Codey.online — https://www.codey.online





 English
  Nederlands
  Frans
Frans  Deutsch
  Español
  Suomi
Suomi  Polski
  Dansk
Dansk  Ελληνικά
  Български
  Čeština
  Hrvatski
  Aileen