SKU: OT2044-D79 Numero articolo: AA440 EAN: 8720589817333

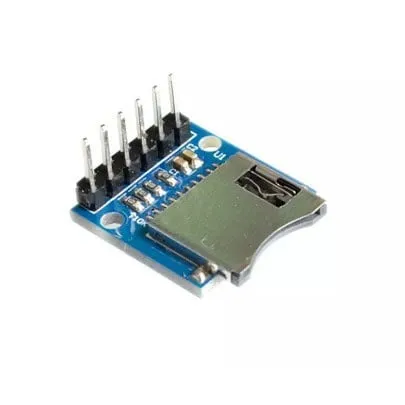
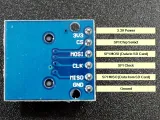
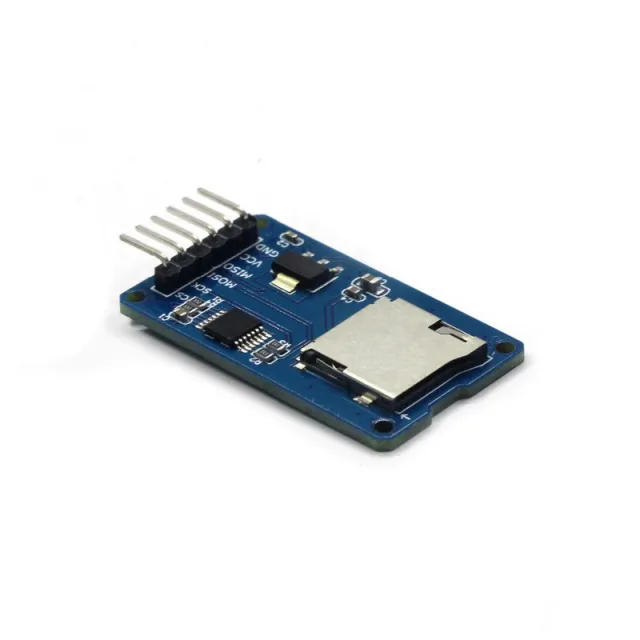
Semplice modulo lettore di schede MicroSD. Grazie al funzionamento a 3.3V è adatto, ad esempio, per ESP32 o ESP8266. Il modulo è dotato delle necessarie resistenze pull-up da 10K sulle linee dati.
Specifiche:
– Tensione di esercizio: 3.3V
- Tipo di slot micro SD: Push-Pull
– Interfaccia: SPI
– Tensione operativa (livello logico): 3.3V
Header pin già pre-saldati.
Dimensioni
Lunghezza: 2cm
Larghezza: 1,8cm
Altezza: 1,1cm
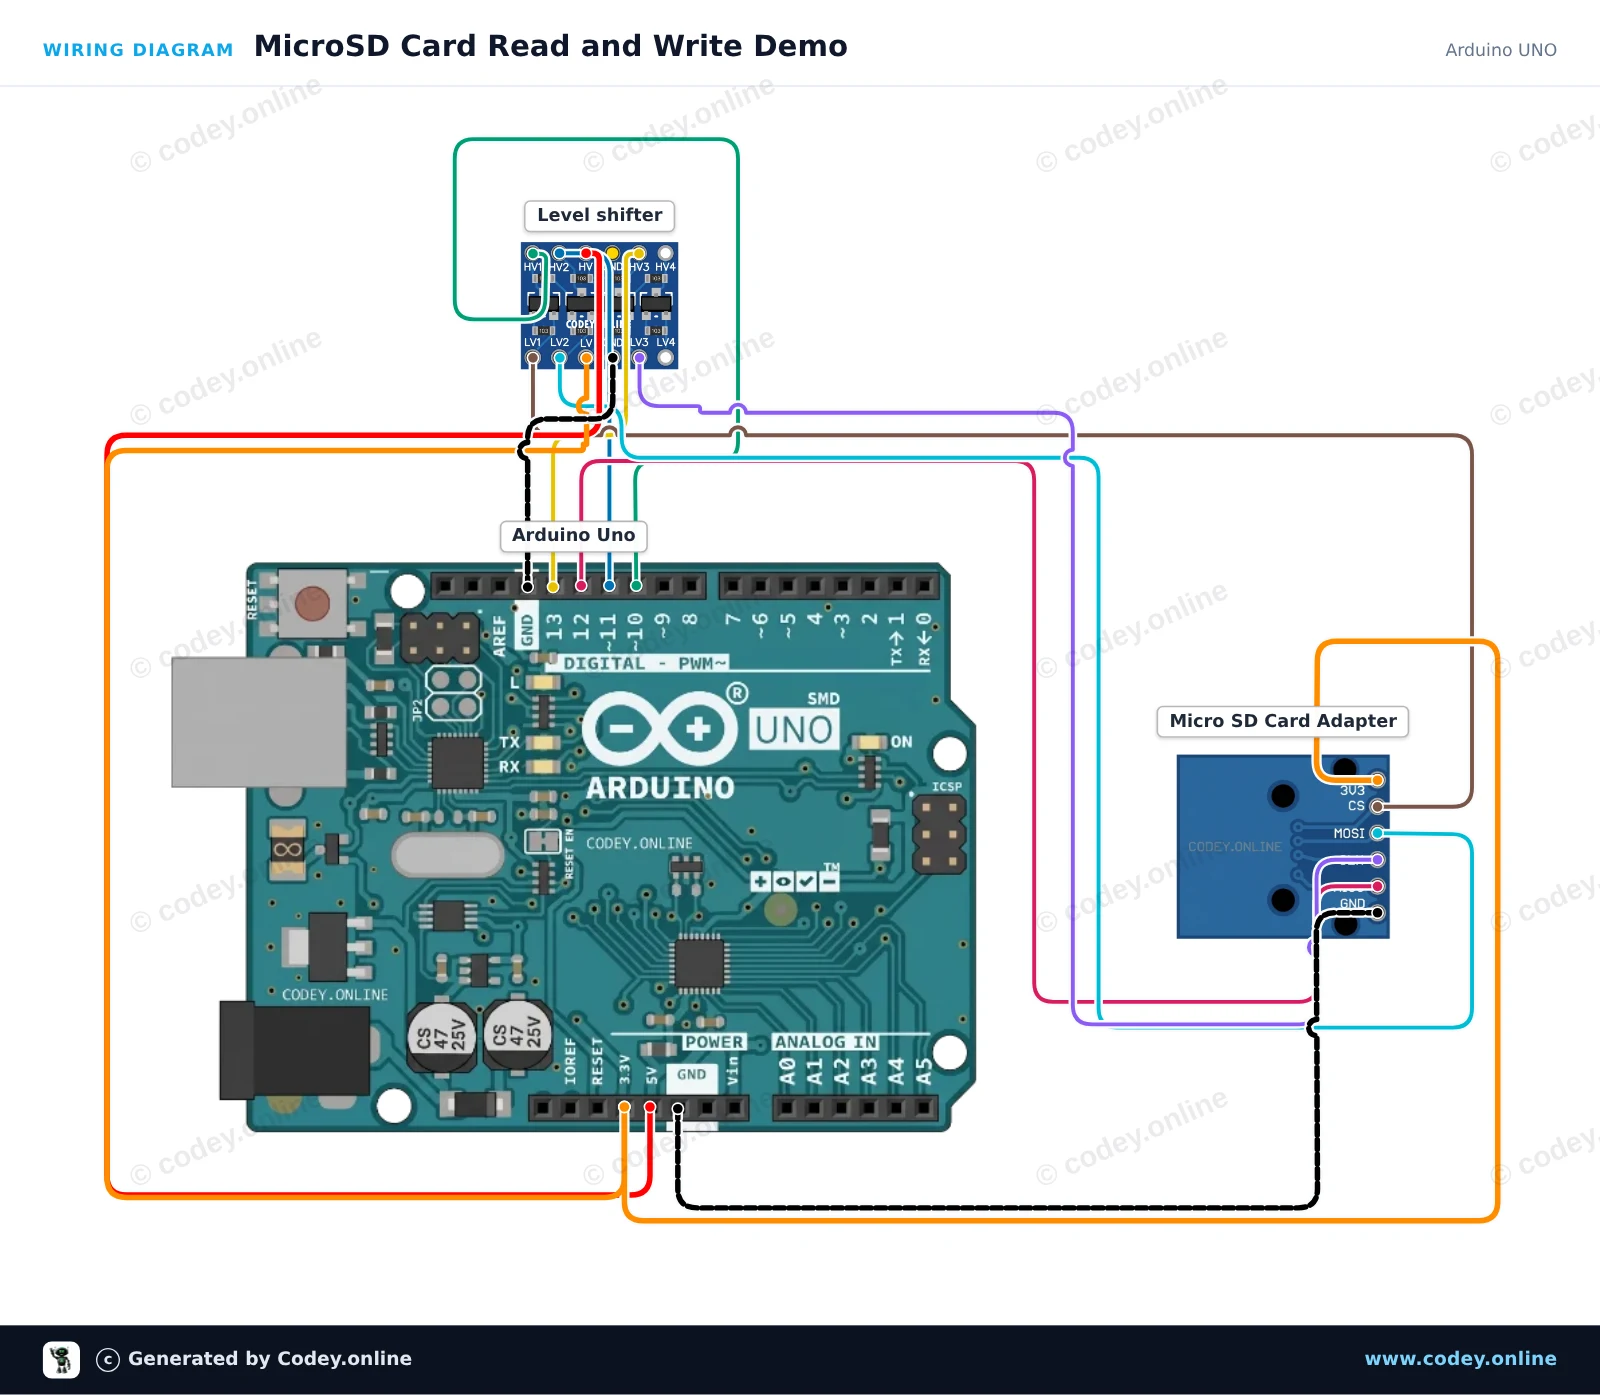
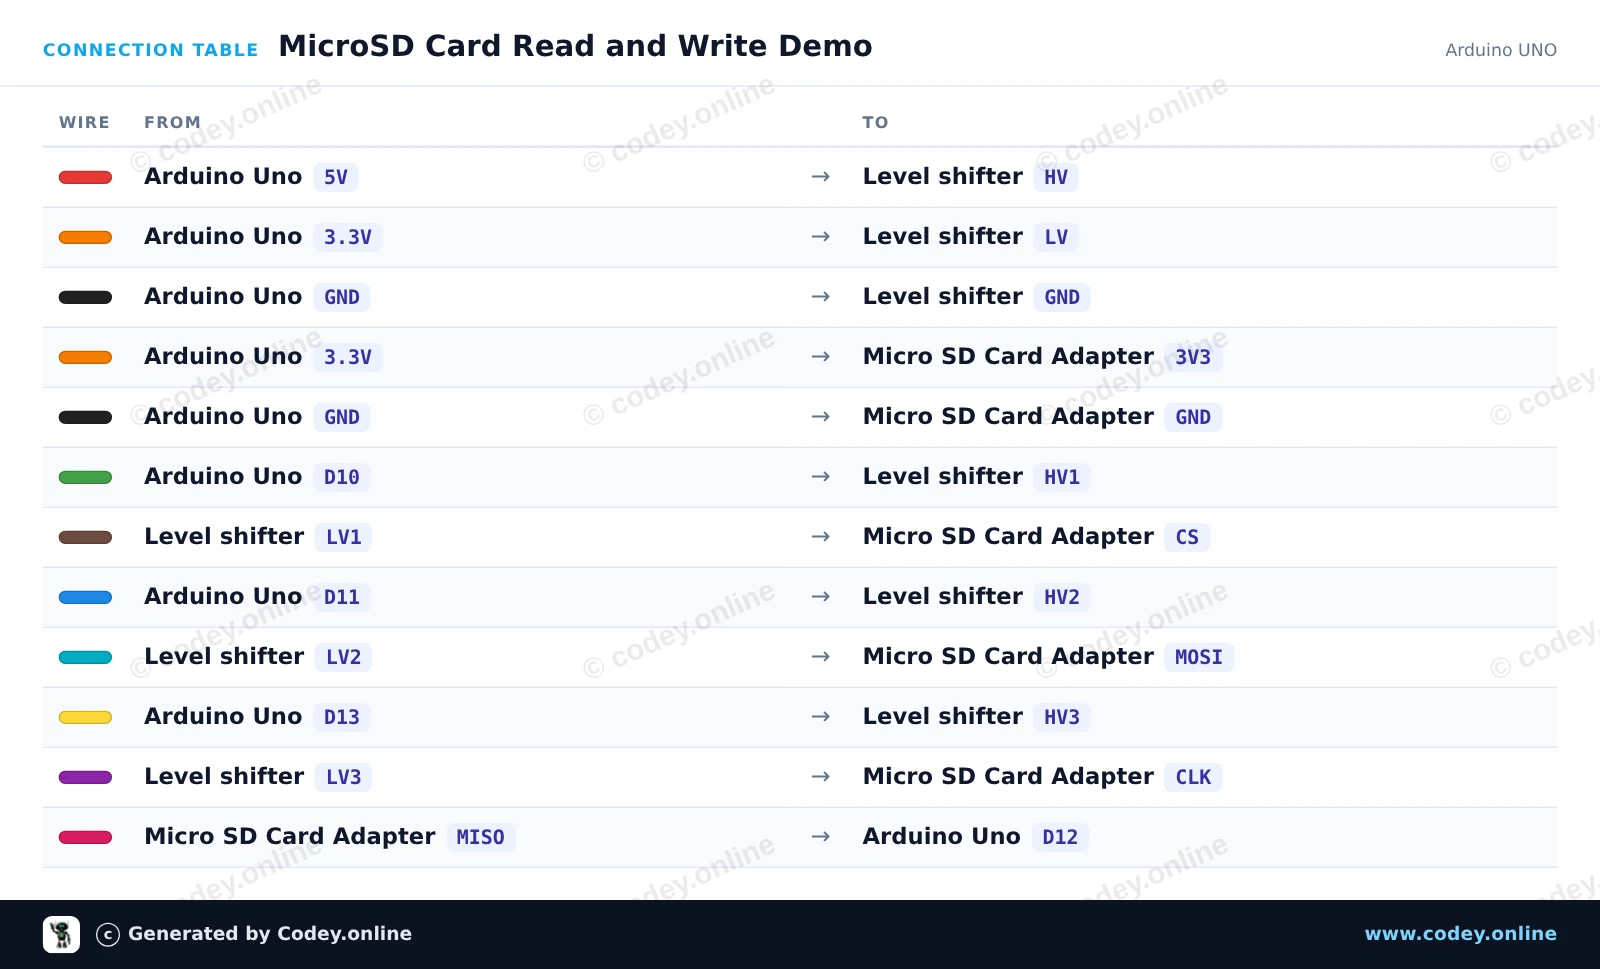
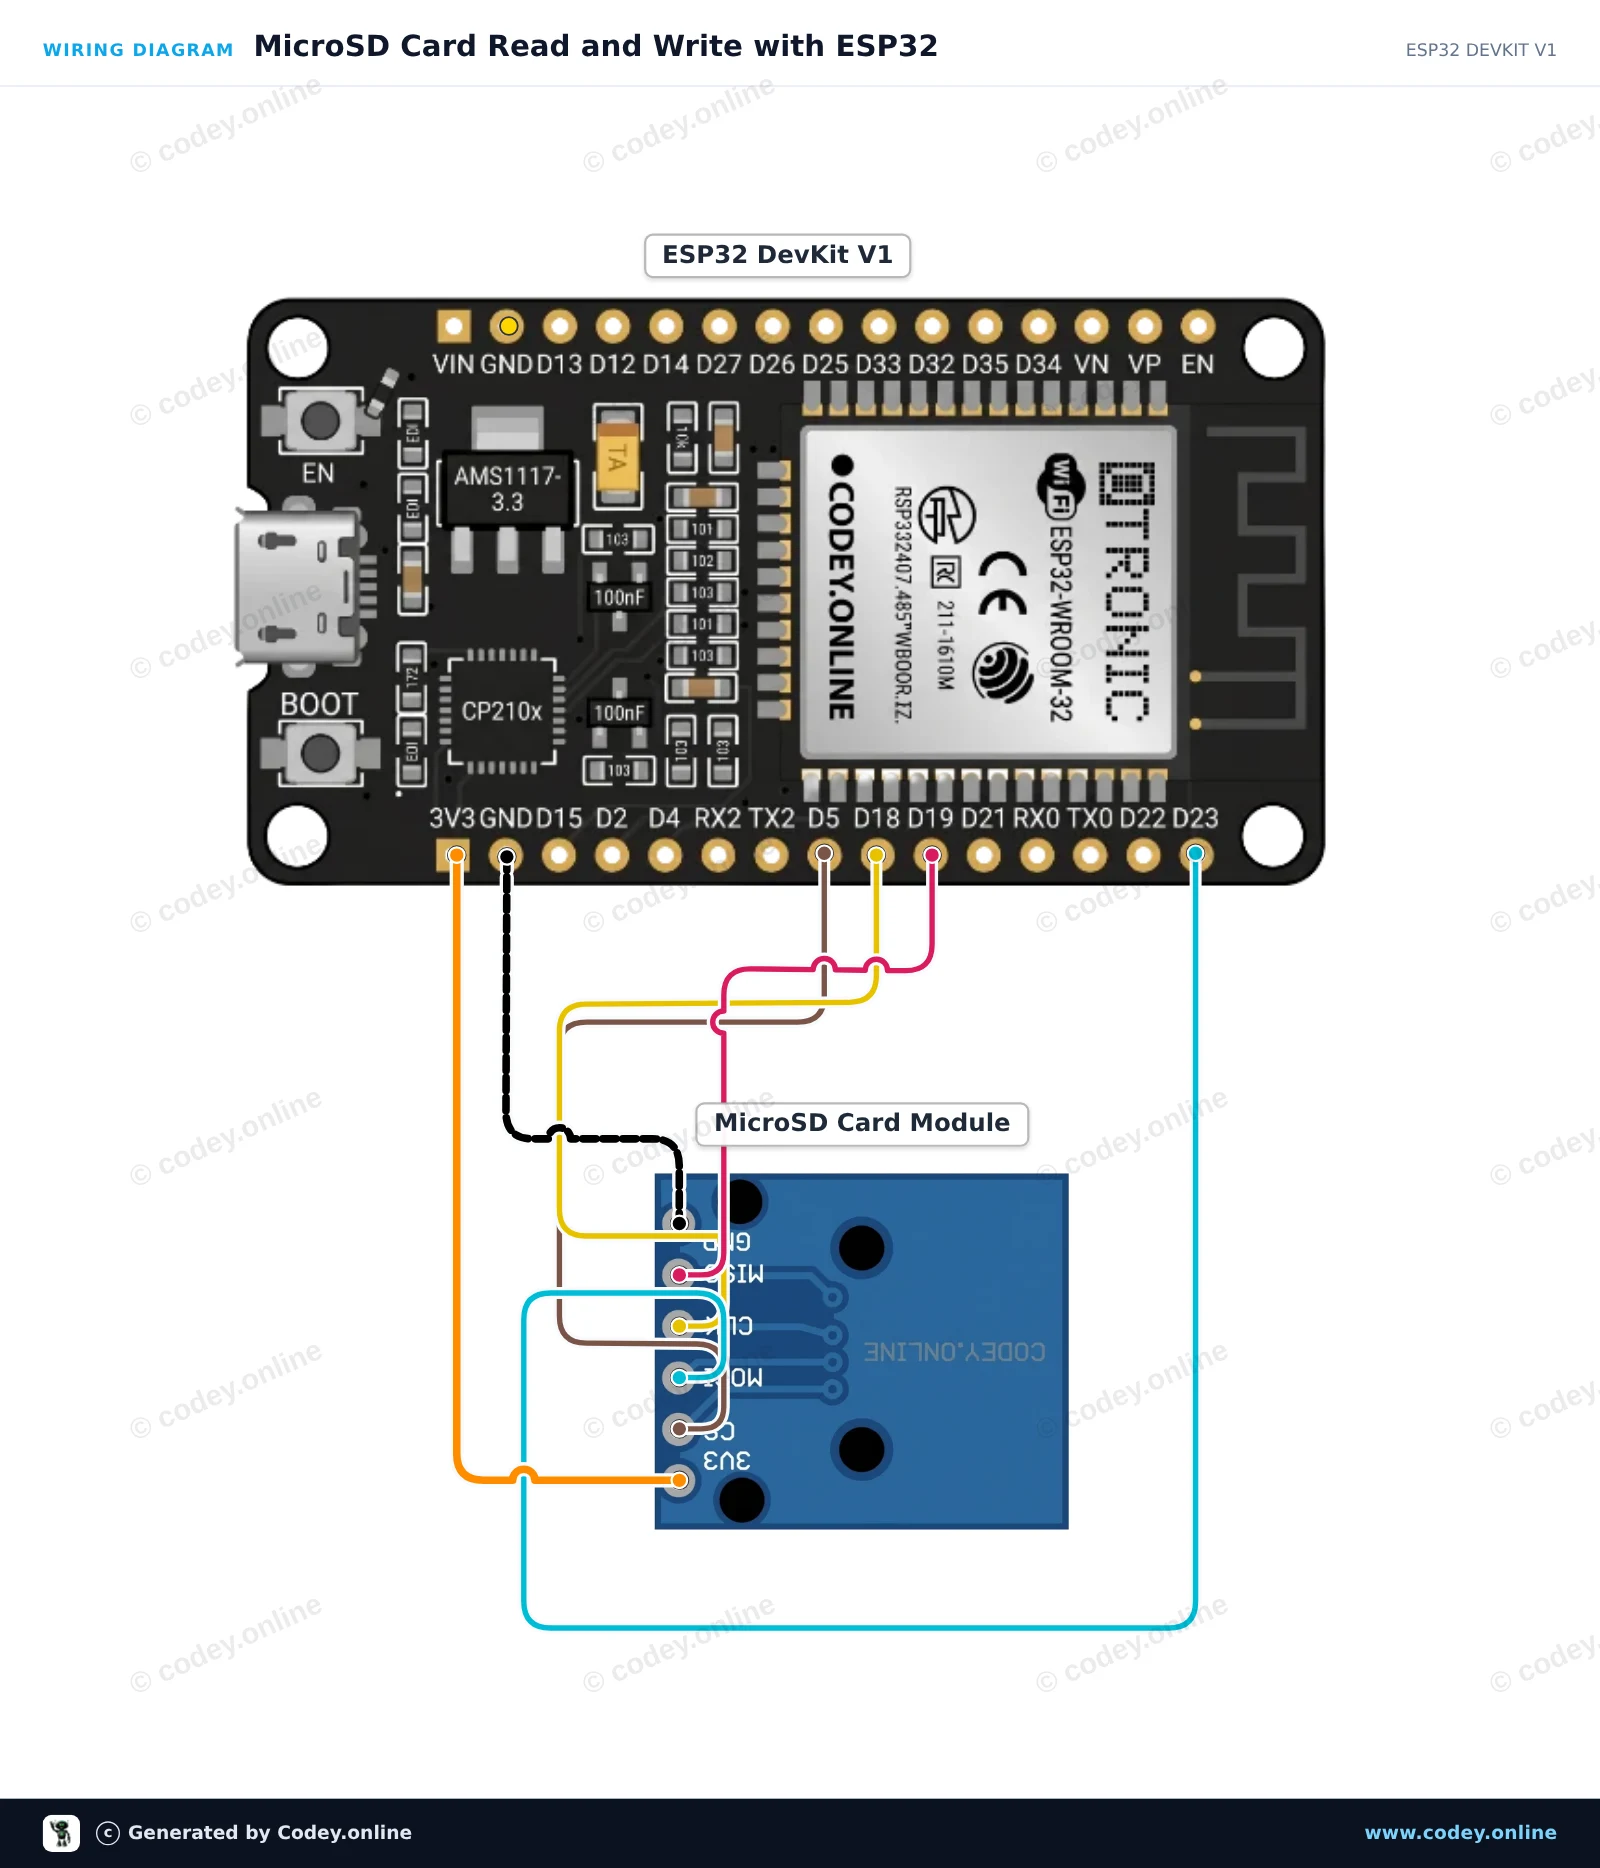
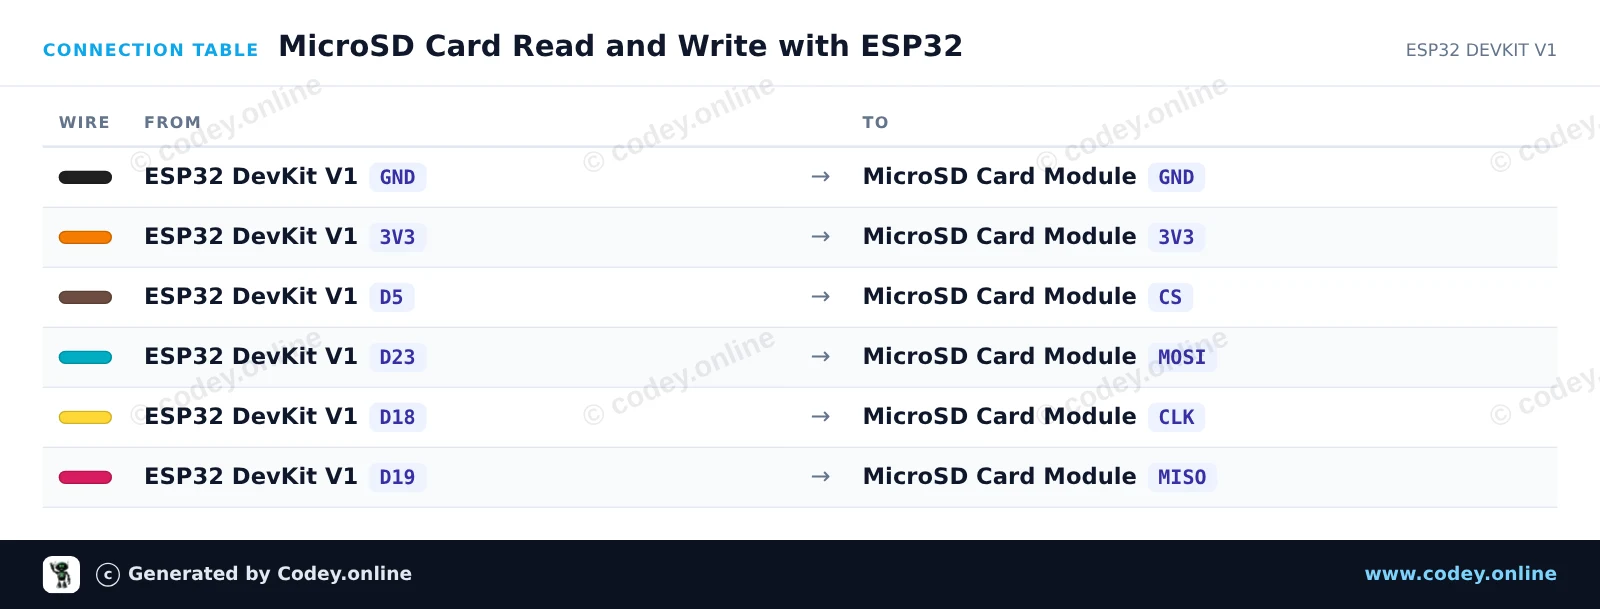
Ecco come collegare il Modulo scheda Micro SD 3.3V per ESP32 | ESP8266 a un Arduino UNO o ESP32, con uno sketch di esempio che puoi caricare subito.
Questo progetto mostra come scrivere testo su una scheda microSD e leggerlo di nuovo tramite SPI. Un convertitore di livello logico a 4 canali adatta in sicurezza i segnali logici a 5V dell’Arduino Uno a 3.3V per il modulo microSD. Apri il Serial Monitor a 115200 baud per visualizzare lo stato di inizializzazione e il contenuto del file.
/*
 * ==================================================================
 *  Generated by Codey.online  —  https://www.codey.online
 * ==================================================================
 *  Project   : MicroSD Card Read and Write Demo
 *  Board     : Arduino UNO (arduino:avr:uno)
 *  Parts     : Micro SD Card Adapter Module 3.3V
 *  Libraries : none (built-in)
 *
 *  Codey Online is an AI-powered browser IDE for Arduino and ESP32.
 *  Describe your project and Codey writes the code, draws the wiring
 *  diagram and uploads it to your board, straight from the browser.
 *  This code is free to use, modify and share, without warranty.
 * ==================================================================
 */

#include <SPI.h>
#include <SD.h>

const int chipSelect = 10;

void setup() {
  Serial.begin(115200);
  while (!Serial) {
    ; // Wait for serial port to connect
  }

  Serial.println(F("Initializing SD card..."));

  if (!SD.begin(chipSelect)) {
    Serial.println(F("Initialization failed! Check connections & SD card."));
    return;
  }
  Serial.println(F("Initialization done."));

  // Write to file
  File myFile = SD.open("demo.txt", FILE_WRITE);
  if (myFile) {
    Serial.println(F("Writing to demo.txt..."));
    myFile.println(F("MicroSD card read/write test successful!"));
    myFile.close();
    Serial.println(F("Done writing."));
  } else {
    Serial.println(F("Error opening demo.txt for writing."));
  }

  // Read from file
  myFile = SD.open("demo.txt");
  if (myFile) {
    Serial.println(F("Contents of demo.txt:"));
    while (myFile.available()) {
      Serial.write(myFile.read());
    }
    myFile.close();
  } else {
    Serial.println(F("Error opening demo.txt for reading."));
  }
}

void loop() {
  // Idle
}Wiring diagram and example code generated by Codey.online — https://www.codey.online
Questo esempio mostra come interfacciare un modulo scheda MicroSD 3.3V con l'ESP32 usando il bus SPI hardware predefinito (VSPI). Lo sketch inizializza la scheda SD, scrive un messaggio di prova in un file e lo legge di nuovo per visualizzarlo nel Serial Monitor.
/*
 * ==================================================================
 *  Generated by Codey.online  —  https://www.codey.online
 * ==================================================================
 *  Project   : MicroSD Card Read and Write with ESP32
 *  Board     : ESP32 DEVKIT V1 (esp32:esp32:esp32doit-devkit-v1)
 *  Parts     : Micro SD Card Adapter Module 3.3V
 *  Libraries : none (built-in)
 *
 *  Codey Online is an AI-powered browser IDE for Arduino and ESP32.
 *  Describe your project and Codey writes the code, draws the wiring
 *  diagram and uploads it to your board, straight from the browser.
 *  This code is free to use, modify and share, without warranty.
 * ==================================================================
 */

#include "FS.h"
#include "SD.h"
#include "SPI.h"

const int chipSelect = 5;

void setup() {
  Serial.begin(115200);
  while (!Serial) { delay(10); }

  Serial.println("\n--- MicroSD Card Demo ---");

  // Initialize SD card on default VSPI pins (CS = GPIO 5)
  if (!SD.begin(chipSelect)) {
    Serial.println("Card Mount Failed! Check wiring and make sure card is FAT32 formatted.");
    return;
  }

  uint8_t cardType = SD.cardType();
  if (cardType == CARD_NONE) {
    Serial.println("No SD card attached.");
    return;
  }

  Serial.print("SD Card Type: ");
  if (cardType == CARD_MMC) {
    Serial.println("MMC");
  } else if (cardType == CARD_SD) {
    Serial.println("SDSC");
  } else if (cardType == CARD_SDHC) {
    Serial.println("SDHC");
  } else {
    Serial.println("UNKNOWN");
  }

  uint64_t cardSize = SD.cardSize() / (1024 * 1024);
  Serial.printf("SD Card Size: %lluMB\n", cardSize);

  // Write to a test file
  Serial.println("Writing to test.txt...");
  File file = SD.open("/test.txt", FILE_WRITE);
  if (file) {
    file.println("Hello from ESP32!");
    file.println("MicroSD read/write test successful.");
    file.close();
    Serial.println("Write complete.");
  } else {
    Serial.println("Failed to open file for writing.");
    return;
  }

  // Read back the test file
  Serial.println("Reading from test.txt:");
  file = SD.open("/test.txt");
  if (file) {
    while (file.available()) {
      Serial.write(file.read());
    }
    file.close();
  } else {
    Serial.println("Failed to open file for reading.");
  }
}

void loop() {
  // Nothing to repeat in this test
  delay(1000);
}Wiring diagram and example code generated by Codey.online — https://www.codey.online





 English
  Nederlands
  Frans
Frans  Deutsch
  Español
  Suomi
Suomi  Polski
  Dansk
Dansk  Ελληνικά
  Български
  Čeština
  Hrvatski
  Aileen